Second News App
A step-by-step guide to publishing a simple news application that uses a SQL database
This tutorial will walk you through the process of building a simple news application that uses a database. You will get hands-on experience in every stage of the development process, writing Python, HTML and JavaScript while recording it in Git’s version control system.
What you will make
By the end of this lesson, you will publish an interactive database and map of notices of foreclosure in Maryland zip codes over the past several years. You will do this with data published by the state at https://opendata.maryland.gov/Housing/Maryland-Notices-of-Intent-to-Foreclose-by-Zip-Cod/ftsr-vapt
Prelude: Prerequisites
Before you can begin, your computer needs the following tools installed and working.
An account at GitHub.com
A browser. That’s it! (We’ll be using GitHub’s Codespaces.)
Act 1: Hello Codespaces
Start at the GitHub URL for your version of this repository
Click the green button and choose “Open in a codespace”. You should see something like this:
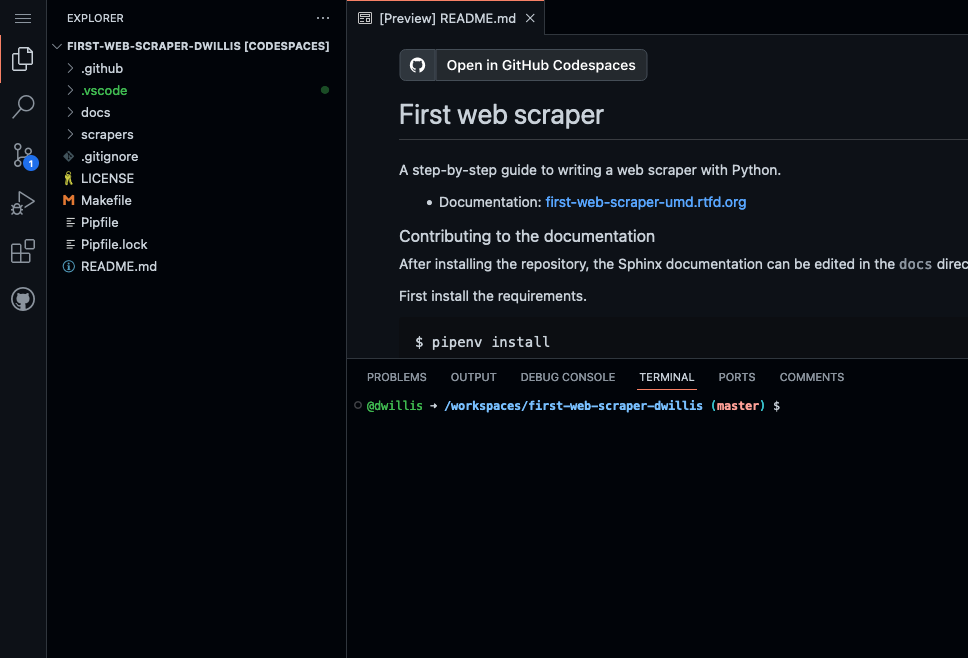
The browser is divided into three sections: on the left is a file explorer, listing all of the files in this repository. The top right shows whatever file you’re currently viewing or editing, defaulting to README.md. The bottom right shows the terminal, where we’ll run commands.
The codespace will be connected to your repository in the the NewsApps organization on GitHub.
Open up the README by clicking on README.md on the left side and type something in it. Maybe change the heading like:
# My Second News App
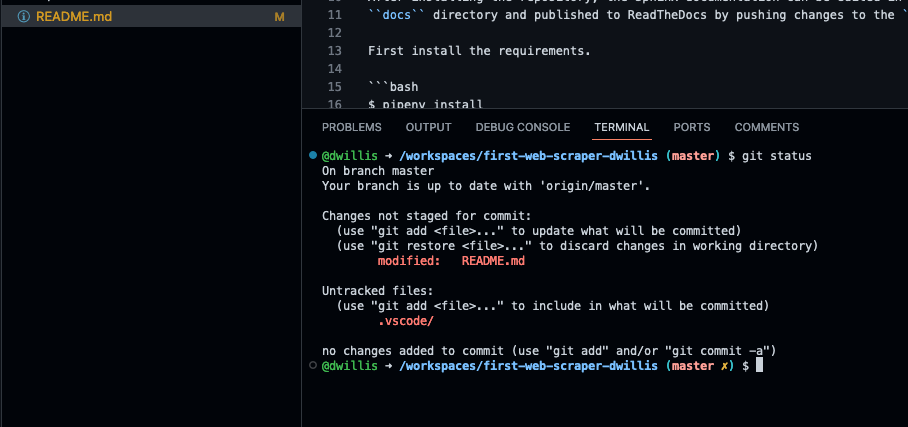
Make sure to save it. You’ll see on the left that there’s a yellow “M” next to README.md, meaning you’ve made some edits. Let’s double-check that in the terminal:
$ git status
You should see something like this:
If so, we can add and commit it:
$ git add README.md
Log its creation with Git’s commit command. You can include a personalized message after the -m flag.
$ git commit -m "First commit"
Now, finally, push your commit up to GitHub.
$ git push origin main
Reload your repository on GitHub and see your handiwork.
Act 2: Hello Flask
Use pip on the command line to install Flask, the Python “microframework” we’ll use to put together our website.
$ pip install Flask
Create a new file called app.py where we will configure Flask.
# in the terminal:
$ touch app.py
Open app.py with your code editor and import the Flask basics. This is the file that will serve as your
application’s “backend,” routing data to the appropriate pages.
from flask import Flask
app = Flask(__name__)  # Note the double underscores on each side!
Next we will configure Flask to make a page at your site’s root URL.
Configure Flask to boot up a test server when you run app.py like so:
from flask import Flask
app = Flask(__name__)

if __name__ == '__main__':
    # Fire up the Flask test server
    app.run(debug=True, use_reloader=True)
Note
You’re probably asking, “What the heck is if __name__ == '__main__'?” The short answer: It’s just one of the weird things in Python you have to memorize. But it’s worth the brain space because it allows you to run any Python script as a program.
Anything indented inside that particular if clause is executed when the script is called from the command line. In this case, that means booting up your web site using Flask’s built-in app.run function.
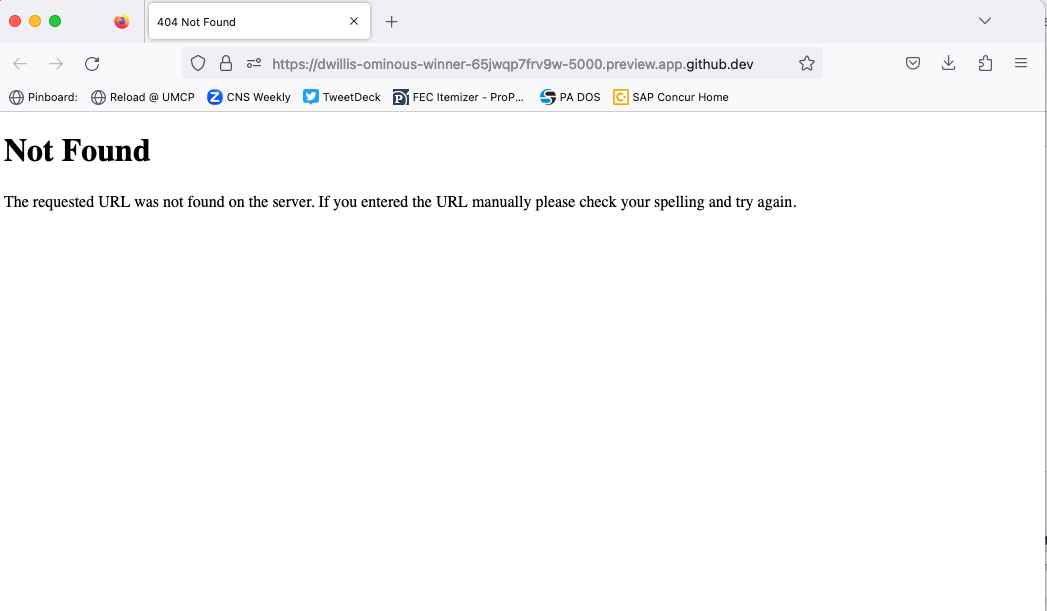
Don’t forget to save your changes. Then run app.py on the command-line and open up your browser to localhost:5000
$ python app.py
Here’s what you should see. A website with nothing to show.
Next we’ll put a page there. Our goal is to publish the complete list of people who died during the riots using a template. We will call that template “index.html”.
Before we do that, return to your command-line interface and stop your webserver by hitting the combination of CTRL-C. You should now again at the standard command-line interface.
Now in app.py import render_template, a Flask function we can use to combine data with HTML to make a webpage.
from flask import Flask
from flask import render_template
app = Flask(__name__)

if __name__ == '__main__':
    # Fire up the Flask test server
    app.run(debug=True, use_reloader=True)
Then create a function called index that returns our rendered index.html template.
from flask import Flask
from flask import render_template
app = Flask(__name__)

def index():
    template = 'index.html'
    return render_template(template)

if __name__ == '__main__':
    # Fire up the Flask test server
    app.run(debug=True, use_reloader=True)
Now use one of Flask’s coolest tricks, the app.route decorator, to connect that function with the root URL of our site, /.
from flask import Flask
from flask import render_template
app = Flask(__name__)

@app.route("/")
def index():
    template = 'index.html'
    return render_template(template)

if __name__ == '__main__':
    # Fire up the Flask test server
    app.run(debug=True, use_reloader=True)
Return to your command line and create a directory to store your templates in the default location Flask expects.
$ mkdir templates
Next create the index.html file we referenced in app.py. This is the HTML file where your will lay out your webpage.
$ touch templates/index.html
Open it up in your text editor and write something clever.
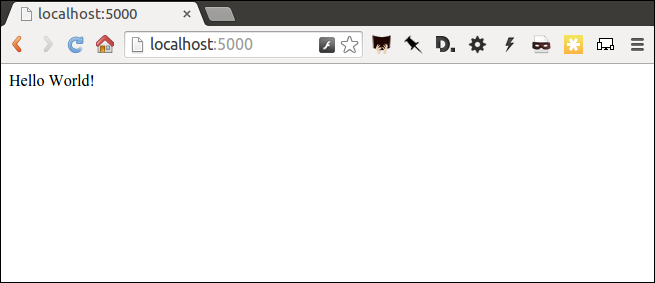
Hello World!
Now restart your Flask server.
$ python app.py
Head back to your browser and visit your site again. You should see the contents of your template displayed on the page.
We’re approaching the end of this act, so it’s time to save your work by returning to the command line and committing these changes to your Git repository.
Note
To get the terminal back up, you will either need to quit out of app.py by hitting CTRL-C, or open a second terminal and do additional work there. If you elect to open a second terminal, which is recommended, make sure to check into the virtualenv by repeating the . bin/activate part of activate. If you choose to quit out of app.py, you will need to turn it back on later by calling python app.py where appropriate.
As we progress through this lesson, you will need to continually do this to switch between the server and terminal. We no longer be instructing to do it each time from here on.
I bet you remember how from above. But here’s a reminder.
$ git add . # Using "." is a trick that will quickly stage *all* files you've changed.
$ git commit -m "Flask app.py and first template"
Push it up to GitHub and check out the changes there.
$ git push origin main
Congratulations, you’ve made a real web page with Flask. Now to put something useful in it.
Start over in your templates/index.html file with a bare-bones HTML document.
<!doctype html>
<html lang="en">
    <head>
        <link rel="stylesheet" href="https://stackpath.bootstrapcdn.com/bootstrap/4.3.1/css/bootstrap.min.css" crossorigin="anonymous">
    </head>
    <body>
        <h1>Maryland Notices of Foreclosure by Zip Code</h1>
    </body>
</html>
Commit the changes to your repository, if only for practice.
$ git add templates/index.html
$ git commit -m "Real HTML"
$ git push origin main
Act 3: Hello SQLite
When you’re Serious About Data (which we are, of course), you store your data in a database, not an Excel spreadsheet or CSV file. They’re faster and more flexible.
Our database is going to be a SQLite database, which is perfect and wonderful because it’s just a file. If I want to send you my database, I can just send it to you via email or Dropbox or whatever - no playing around with installing things or servers or anything like this. Think of it like a small upgrade to a CSV file.
To create our new SQLite database, we’re going to start with a CSV file. First, make a directory to store our data file.
$ mkdir static
Download the comma-delimited file that will be the backbone of our application and save it in the static directory as foreclosures_by_month.csv. Now we’ll install the tools necessary to turn it into a SQLite database, namely sqlite-utils.
Then we’ll create the database from the CSV file:
$ cd static
$ wget https://raw.githubusercontent.com/NewsAppsUMD/second-news-app-umd/main/docs/_static/foreclosures_by_month.csv
$ cd ..
$ pip install sqlite-utils
$ sqlite-utils insert foreclosures.db zip_months static/foreclosures_by_month.csv --csv
Add both the CSV and database file to your git repository.
$ git add static
$ git commit -m "Added CSV source data and db file"
$ git push origin main
Once upon a time there were databases, and there was SQL, and there were people who loved writing SQL. SQL is cool, SQL is great!
Then everyone else was invented, and they didn’t like writing SQL, they just liked writing Python. So the Gods invented ORMs, which basically mean “instead of writing SQL you’ll just write Python and the ORM will talk to the database for you.”
Now everyone can be happy, sort of.
There are a handful of ORMs that work for Python, and plenty that work with Flask. We’ll use one called Peewee, because, well, it’s small:
$ pip install peewee
Next we will open up app.py in your code editor and add the import needed to use it:
from flask import Flask
from flask import render_template
from peewee import *
app = Flask(__name__)

@app.route("/")
def index():
    template = 'index.html'
    return render_template(template)

if __name__ == '__main__':
    app.run(debug=True, use_reloader=True)
Now we need to tell Flask about our database and its notices table. Every table is called a Model, and we use that model to play around with its associated table from Python. (Although we only have one table in this case, so we’ll only have one model).
Going back to our code - right after we make our Flask app with app = Flask(__name__), you’ll want to tell Peewee everything important about the database and its tables. It’ll look like this:
from flask import Flask
from flask import render_template
from peewee import *
app = Flask(__name__)

db = SqliteDatabase('foreclosures.db')

class ZipMonth(Model):
    id = IntegerField(unique=True)
    zip = CharField()
    month = DateField()
    notices = IntegerField()

    class Meta:
        database = db
Let’s take it line-by-line to get an idea of what’s going on (or a-few-lines by a-few-lines).
First off, you tell the app where to find the database and have Peewee read it. Then we tell Peewee about the notices table.
We need to tell the model several things:
Its name. In this case, we’re calling it ZipMonth, because each row represents a month of notices for a zip code.
The columns and their datatypes. We also add a “unique=True” to the id column because no two values of that column are the same.
The Meta class just makes explicit which database the zip_months table is in (we could use multiple databases) and the table name (in case we want to change it).
Fire up the server if it isn’t running and give your page a refresh to make sure you don’t have any typos or other little issues, and then we’ll charge ahead to actually using this model.
We don’t know how to make our database talk to the web page yet, so we’re going to cheat a little bit. Let’s edit the /index route to make it print something out:
from flask import Flask
from flask import render_template
from peewee import *
app = Flask(__name__)

db = SqliteDatabase('foreclosures.db')

class ZipMonth(Model):
    id = IntegerField(unique=True)
    zip = CharField()
    month = DateField()
    notices = IntegerField()

    class Meta:
        table_name = "zip_months"
        database = db

@app.route("/")
def index():
    print("Total number of rows in the zip_months table is", ZipMonth.select().count())
    template = 'index.html'
    return render_template(template)

if __name__ == '__main__':
    app.run(debug=True, use_reloader=True)
Refresh the page and you’ll see… nothing changed? But pop on over to your command line, and you’ll see a secret little line hiding in the debug output.
When you use print in the Flask app, it doesn’t print to the web page. That’s the render_template part. Instead, print prints to the command line. It’s totally useless for showing things to the user, but a nice cheat to check things and help us debug.
Where’d that 11488 come from? ZipMonth.select().count()! We used our model - ZipMonth - to visit the database, build a new query, and count the number of rows in the table.
Because we’re using an Peewee, we write Python, not SQL. Peewee takes care of the translation to SQL and just gives us the result.
For example, we can do a WHERE query - filtering our data - by using get or where. Retrieving a single records might look like this:
>>> zip = ZipMonth.get(zip == '20906')
>>> zip.id
3949
To play around a little, let’s try to find a specific zip code and month and print out its number of notices. We can use where to do that as well:
from flask import Flask
from flask import render_template
from peewee import *
app = Flask(__name__)

db = SqliteDatabase('foreclosures.db')

class ZipMonth(Model):
    id = IntegerField(unique=True)
    zip = CharField()
    month = DateField()
    notices = IntegerField()

    class Meta:
        table_name = "zip_months"
        database = db

@app.route("/")
def index():
    print("Total number of notices is", ZipMonth.select().count())
    notice = ZipMonth.select().where(ZipMonth.id==3963).get()
    print(f"Zip code {notice.zip} had {notice.notices} in {notice.month}")
    template = 'index.html'
    return render_template(template)

if __name__ == '__main__':
    app.run(debug=True, use_reloader=True)
Make sure to save app.py. Then reload the page and check the output in the terminal - remember, we’re not showing anything on the page yet.
What comes back from the database is that one row where ZipMonth.id==3963 - we only got one because we asked for .get(). It works just like a normal variable, kind of like a dictionary that you don’t need [‘whatever’] for. Instead, you can just ask for each column with a period.
Since zip is the column with the zip code in it, we can just ask for notice.zip and it will print right out.
If we want to get fancier, we can also select multiple rows with .where().
from flask import Flask
from flask import render_template
from peewee import *
app = Flask(__name__)

db = SqliteDatabase('foreclosures.db')

class ZipMonth(Model):
    id = IntegerField(unique=True)
    zip = CharField()
    month = DateField()
    notices = IntegerField()

    class Meta:
        table_name = "zip_months"
        database = db

@app.route("/")
def index():
    print("Total number of notices is", ZipMonth.select().count())
    notice = ZipMonth.select().where(ZipMonth.id==3963).get()
    print(f"Zip code {ZipMonth.zip} had {ZipMonth.notices} in {ZipMonth.month}")
    notices_20906 = ZipMonth.select().where(ZipMonth.zip=='20906')
    for notice in notices_20906:
        print(notice.notices)
    template = 'index.html'
    return render_template(template)

if __name__ == '__main__':
    app.run(debug=True, use_reloader=True)
Save app.py, reload the index page and check the terminal again. Lots of printing!
We’ve been flexing our sweet new Peewee ORM, testing our skills at querying and counting and WHEREing without WHEREs, but how about we actually make this useful? In the next section we’ll take a look at how we can put this data on the actual web page.
Act 4: Hello HTML
Let’s edit our index template so that we’re sending some information from the database directly to the page. We’ll replace the print statements in our app.py and add some variables to the template:
from flask import Flask
from flask import render_template
from peewee import *
app = Flask(__name__)

db = SqliteDatabase('foreclosures.db')

class ZipMonth(Model):
    id = IntegerField(unique=True)
    zip = CharField()
    month = DateField()
    notices = IntegerField()

    class Meta:
        table_name = "zip_months"
        database = db

@app.route("/")
def index():
    notice_count = ZipMonth.select().count()
    template = 'index.html'
    return render_template(template, count = notice_count)

if __name__ == '__main__':
    app.run(debug=True, use_reloader=True)
Now, in the template file, let’s add our count variable to the template and clean things up:
<!doctype html>
<html lang="en">
    <head>
        <link rel="stylesheet" href="https://stackpath.bootstrapcdn.com/bootstrap/4.3.1/css/bootstrap.min.css" crossorigin="anonymous">
    </head>
    <body>
        <h1>Maryland Notices of Foreclosure by Zip Code</h1>
        <p>There are {{ count }} records in the database.</p>
    </body>
</html>
Sending a single integer to our template is pretty easy, but so is sending a whole mess of things! Let’s send those notices from the 20906 ZIP code.
from flask import Flask
from flask import render_template
from peewee import *
app = Flask(__name__)

db = SqliteDatabase('foreclosures.db')

class ZipMonth(Model):
    id = IntegerField(unique=True)
    zip = CharField()
    month = DateField()
    notices = IntegerField()

    class Meta:
        table_name = "zip_months"
        database = db

@app.route("/")
def index():
    notice_count = ZipMonth.select().count()
    notices_20906 = ZipMonth.select().where(ZipMonth.zip=='20906')
    template = 'index.html'
    return render_template(template, count = notice_count, notices = notices_20906)

if __name__ == '__main__':
    app.run(debug=True, use_reloader=True)
Save that, and then we’ll update the template:
<!doctype html>
<html lang="en">
    <head>
        <link rel="stylesheet" href="https://stackpath.bootstrapcdn.com/bootstrap/4.3.1/css/bootstrap.min.css" crossorigin="anonymous">
    </head>
    <body>
        <h1>Maryland Notices of Foreclosure by Zip Code</h1>
        <p>There are {{ count }} records in the database.</p>
        {% for notice in notices %}
           <p>{{ notice.month }}: {{ notice.notices }}</p>
        {% endfor %}
    </body>
</html>
Refresh, and you should be good to go! If not, make sure you matched up the variable names from app.py to the template.
We can’t (shouldn’t) put every zip code on the same page - we should make a page for each zip code! Let’s do that. We’ll use the zip code itself as the slug in the url.
To build our detail page, we need a new route in app.py. This is going to be a special route, since the end of the URL can change - /zipcode/20906 is different from /zipcode/21012. To accomplish this we add a variable into our route.
from flask import Flask
from flask import render_template
from peewee import *
app = Flask(__name__)

db = SqliteDatabase('foreclosures.db')

class ZipMonth(Model):
    id = IntegerField(unique=True)
    zip = CharField()
    month = DateField()
    notices = IntegerField()

    class Meta:
        table_name = "zip_months"
        database = db

@app.route("/")
def index():
    notice_count = ZipMonth.select().count()
    notices_20906 = ZipMonth.select().where(ZipMonth.zip=='20906')
    template = 'index.html'
    return render_template(template, count = notice_count, notices = notices_20906)

@app.route('/zipcode/<slug>')
def detail(slug):
    zipcode = slug
    notices = ZipMonth.select().where(ZipMonth.zip==slug)
    total_notices = ZipMonth.select(fn.SUM(ZipMonth.notices).alias('sum')).where(ZipMonth.zip==slug).scalar()
    return render_template("detail.html", zipcode=zipcode, notices=notices, notices_count=len(notices), total_notices = total_notices)

if __name__ == '__main__':
    app.run(debug=True, use_reloader=True)
Now anything can do into the part after /zipcode/. If we want to find 20906, we’ll check out /zipcode/20906. But first we need to create detail template!
$ touch templates/detail.html
Let’s make it look good and show off our data:
<!doctype html>
<html>
  <head>
    <title>Zip code: {{ zipcode }}</title>
    <link rel="stylesheet" href="https://stackpath.bootstrapcdn.com/bootstrap/4.3.1/css/bootstrap.min.css" crossorigin="anonymous">
  </head>
  <body>
      <nav class="navbar navbar-expand-lg navbar-dark bg-dark">
        <a class="navbar-brand" href="/">Zip Codes</a>
      </nav>
      <div class="jumbotron">
        <div class="container">
          <h1 class="display-4">{{ zipcode }}</h1>
          <p class="lead">This zip code has {{ notices_count }} records and {{ total_notices }} total notices.</p>
        </div>
      </div>
    </div>
  </body>
</html>
Save both app.py and the detail template, make sure the app is running and check out one of your zipcode urls (like /zipcode/20906).
Now let’s generate a list of zip codes that can link to the detail pages from the index template. First we’ll need to send a list of all zip codes to the template by adding that to app.py:
from flask import Flask
from flask import render_template
from peewee import *
app = Flask(__name__)

db = SqliteDatabase('foreclosures.db')

class ZipMonth(Model):
    id = IntegerField(unique=True)
    zip = CharField()
    month = DateField()
    notices = IntegerField()

    class Meta:
        table_name = "zip_months"
        database = db

@app.route("/")
def index():
    notice_count = ZipMonth.select().count()
    all_zips = (ZipMonth.select(ZipMonth.zip).distinct())
    template = 'index.html'
    return render_template(template, count = notice_count, all_zips = all_zips)

@app.route('/zipcode/<slug>')
def detail(slug):
    zipcode = slug
    notices = ZipMonth.select().where(ZipMonth.zip==slug)
    return render_template("detail.html", zipcode=zipcode, notices=notices, notices_count=len(notices))

if __name__ == '__main__':
    app.run(debug=True, use_reloader=True)
Then we can plug those zip codes in and build URLs.
<!doctype html>
<html lang="en">
    <head>
        <link rel="stylesheet" href="https://stackpath.bootstrapcdn.com/bootstrap/4.3.1/css/bootstrap.min.css" crossorigin="anonymous">
    </head>
    <body>
    <nav class="navbar navbar-expand-lg navbar-dark bg-dark">
        <a class="navbar-brand" href="/">Maryland Foreclosure Notices by Zip Code</a>
    </nav>
      <div class="jumbotron">
        <div class="container">
            <h1>Maryland Notices of Foreclosure by Zip Code</h1>
            <p>There are {{ count }} records in the database.</p>
            <h3>Zip Codes</h3>
            <div class="row">
            <div class="col-md-4">
            <ul class="list-unstyled">
                {% for zip in all_zips %}
                    <li><a href="/zipcode/{{ zip.zip }}">{{ zip.zip }}</a></li>
                    {% if loop.index % 3 == 0 and not loop.last %}
                    </ul>
                        </div>
                        <div class="col-md-4">
                            <ul class="list-unstyled">
                        {% endif %}
                    {% endfor %}
                </ul>
            </div>
        </div>
    </div>
    </body>
</html>
Now, let’s think about visualizing this data. Let’s create a heatmap of the monthly data for each zip code. To do that, we’ll need to create that monthly data in app.py:
from flask import Flask
from flask import render_template
from peewee import *
app = Flask(__name__)

db = SqliteDatabase('foreclosures.db')

class ZipMonth(Model):
    id = IntegerField(unique=True)
    zip = CharField()
    month = DateField()
    notices = IntegerField()

    class Meta:
        table_name = "zip_months"
        database = db

@app.route("/")
def index():
    notice_count = ZipMonth.select().count()
    all_zips = (ZipMonth.select(ZipMonth.zip).distinct())
    template = 'index.html'
    return render_template(template, count = notice_count, all_zips = all_zips)

@app.route('/zipcode/<slug>')
def detail(slug):
    zipcode = slug
    notices = ZipMonth.select().where(ZipMonth.zip==slug)
    total_notices = ZipMonth.select(fn.SUM(ZipMonth.notices).alias('sum')).where(ZipMonth.zip==slug).scalar()
    notice_json = []
    for notice in notices:
        notice_json.append({'x': str(notice.month.year) + ' ' + str(notice.month.month), 'y': notice.zip, 'heat': notice.notices})
    return render_template("detail.html", zipcode=zipcode, notices=notices, notices_count=len(notices), notice_json = notice_json, total_notices = total_notices)

if __name__ == '__main__':
    app.run(debug=True, use_reloader=True)
Then we can add a JavaScript library to our template and load the JSON data:
<!doctype html>
<html>
  <head>
    <title>Zip code: {{ zipcode }}</title>
    <link rel="stylesheet" href="https://stackpath.bootstrapcdn.com/bootstrap/4.3.1/css/bootstrap.min.css" crossorigin="anonymous">
    <script src="https://cdn.anychart.com/releases/8.7.1/js/anychart-core.min.js"></script>
    <script src="https://cdn.anychart.com/releases/8.7.1/js/anychart-heatmap.min.js"></script>
  </head>
  <body>
      <nav class="navbar navbar-expand-lg navbar-dark bg-dark">
        <a class="navbar-brand" href="/">Maryland Foreclosure Notices by Zip Code</a>
      </nav>
      <div class="jumbotron">
        <div class="container">
          <h1 class="display-4">{{ zipcode }}</h1>
          <p class="lead">This zip code has {{ notices_count }} records and {{ total_notices }} total notices.</p>
        </div>
      </div>
      <div id="container"></div>
      <script>
        anychart.onDocumentReady(function () {
            var data = {{ notice_json|tojson }};
            chart = anychart.heatMap(data);
            chart.title("Monthly Foreclosure Notices");
            var customColorScale = anychart.scales.linearColor();
            customColorScale.colors(["#ACE8D4", "#00726A"]);
            chart.colorScale(customColorScale);
            chart.container("container");
            chart.draw();
        });
      </script>
    </div>
  </body>
</html>
Reload one of your zip code pages and you’ll see a horizontal heat map where the monthly values are shaded according to the number of notices.
Act 5: Hello Census
We’d like to know more about the households in these zip codes. For that, we can ask the Census Bureau for help, via its APIs. If you don’t already have a key (or can’t find it), you can get one here.
You should add that Census API to your repository as a Codespaces secret called CENSUS_API_KEY. Having done that, you should reload your codespace for it to take effect.
We’ll need a way for Python to talk to the Census API, and there’s a handy library for that called, well, census. Let’s pip install it:
$ pip install census
Let’s check out this library in the terminal. We’ll use it to get the number of owner-occupied housing units in the 20906 zip code from the ACS. The variable for that category is B25003_002E and can be found at this page.
>>> from census import Census
>>> import os
>>> census_api_key = os.environ.get('CENSUS_API_KEY')
>>> c = Census(census_api_key)
>>> c.acs5.state_zipcode(('NAME', 'B25003_002E'), '24', '20906')
[{'NAME': 'ZCTA5 20906', 'B25003_002E': 16570.0, 'zip code tabulation area': '20906'}]
Take a look at what’s going on here: we’re calling the ACS 5-year data and using the state_zipcode function to retrieve results for a specific state and zip code. In our case, we use 24 as the state code for Maryland and 20906 as the zip code. The result is an Array with one dictionary that contains the number of households, 16570, for this zip code.
Let’s incorporate that into our detail page, first by adding code to our app.py file. Replace your app.py with this:
import os
from peewee import *
from census import Census
from flask import Flask
from flask import render_template
app = Flask(__name__)
db = SqliteDatabase('foreclosures.db')
census_api_key = os.environ.get('CENSUS_API_KEY')
c = Census(census_api_key)

class ZipMonth(Model):
    id = IntegerField(unique=True)
    zip = CharField()
    month = DateField()
    notices = IntegerField()

    class Meta:
        table_name = "zip_months"
        database = db

@app.route("/")
def index():
    notice_count = ZipMonth.select().count()
    all_zips = (ZipMonth.select(ZipMonth.zip).distinct())
    template = 'index.html'
    return render_template(template, count = notice_count, all_zips = all_zips)

@app.route('/zipcode/<slug>')
def detail(slug):
    zipcode = slug
    notices = ZipMonth.select().where(ZipMonth.zip==slug)
    total_notices = ZipMonth.select(fn.SUM(ZipMonth.notices).alias('sum')).where(ZipMonth.zip==slug).scalar()
    notice_json = []
    for notice in notices:
        notice_json.append({'x': str(notice.month.year) + ' ' + str(notice.month.month), 'y': notice.zip, 'heat': notice.notices})
    owner_occupied = c.acs5.state_zipcode(('NAME', 'B25003_002E'), '24', zipcode)
    return render_template("detail.html", zipcode=zipcode, notices=notices, notices_count=len(notices), notice_json = notice_json, total_notices = total_notices, owner_occupied = owner_occupied[0]['B25003_002E'])

if __name__ == '__main__':
    app.run(debug=True, use_reloader=True)
Then let’s update the detail template to make it so we can display a sentence listing the number of owner-occupied housing units.
<!doctype html>
<html>
  <head>
    <title>Zip code: {{ zipcode }}</title>
    <link rel="stylesheet" href="https://stackpath.bootstrapcdn.com/bootstrap/4.3.1/css/bootstrap.min.css" crossorigin="anonymous">
    <script src="https://cdn.anychart.com/releases/8.7.1/js/anychart-core.min.js"></script>
    <script src="https://cdn.anychart.com/releases/8.7.1/js/anychart-heatmap.min.js"></script>
  </head>
  <body>
      <nav class="navbar navbar-expand-lg navbar-dark bg-dark">
        <a class="navbar-brand" href="/">Maryland Foreclosure Notices by Zip Code</a>
      </nav>
      <div class="jumbotron">
        <div class="container">
          <h1 class="display-4">{{ zipcode }}</h1>
          <p class="lead">This zip code has {{ notices_count }} records and {{ total_notices }} total notices. There are {{ owner_occupied }} owner-occupied housing units in this zip code, according to the Census Bureau's American Community Survey.</p>
        </div>
      </div>
      <div id="container"></div>
      <script>
        anychart.onDocumentReady(function () {
            var data = {{ notice_json|tojson }};
            chart = anychart.heatMap(data);
            chart.title("Monthly Foreclosure Notices");
            var customColorScale = anychart.scales.linearColor();
            customColorScale.colors(["#ACE8D4", "#00726A"]);
            chart.colorScale(customColorScale);
            chart.container("container");
            chart.draw();
        });
      </script>
    </div>
  </body>
</html>
Fire up the server and check out the detail page for zip code 20906. That’s pretty good, but the formatting of the number is not great. We can do better, and our friend Simon shows one way to do it.
First we’ll make sure that app.py is sending an integer, not a float, to the template:
import os
from peewee import *
from census import Census
from flask import Flask
from flask import render_template
app = Flask(__name__)
db = SqliteDatabase('foreclosures.db')
census_api_key = os.environ.get('CENSUS_API_KEY')
c = Census(census_api_key)

class ZipMonth(Model):
    id = IntegerField(unique=True)
    zip = CharField()
    month = DateField()
    notices = IntegerField()

    class Meta:
        table_name = "zip_months"
        database = db

@app.route("/")
def index():
    notice_count = ZipMonth.select().count()
    all_zips = (ZipMonth.select(ZipMonth.zip).distinct())
    template = 'index.html'
    return render_template(template, count = notice_count, all_zips = all_zips)

@app.route('/zipcode/<slug>')
def detail(slug):
    zipcode = slug
    notices = ZipMonth.select().where(ZipMonth.zip==slug)
    total_notices = ZipMonth.select(fn.SUM(ZipMonth.notices).alias('sum')).where(ZipMonth.zip==slug).scalar()
    notice_json = []
    for notice in notices:
        notice_json.append({'x': str(notice.month.year) + ' ' + str(notice.month.month), 'y': notice.zip, 'heat': notice.notices})
    owner_occupied = c.acs5.state_zipcode(('NAME', 'B25003_002E'), '24', zipcode)
    return render_template("detail.html", zipcode=zipcode, notices=notices, notices_count=len(notices), notice_json = notice_json, total_notices = total_notices, owner_occupied = int(owner_occupied[0]['B25003_002E']))

if __name__ == '__main__':
    app.run(debug=True, use_reloader=True)
And then we’ll change the detail template to add the comma formatting:
<!doctype html>
<html>
  <head>
    <title>Zip code: {{ zipcode }}</title>
    <link rel="stylesheet" href="https://stackpath.bootstrapcdn.com/bootstrap/4.3.1/css/bootstrap.min.css" crossorigin="anonymous">
    <script src="https://cdn.anychart.com/releases/8.7.1/js/anychart-core.min.js"></script>
    <script src="https://cdn.anychart.com/releases/8.7.1/js/anychart-heatmap.min.js"></script>
  </head>
  <body>
      <nav class="navbar navbar-expand-lg navbar-dark bg-dark">
        <a class="navbar-brand" href="/">Maryland Foreclosure Notices by Zip Code</a>
      </nav>
      <div class="jumbotron">
        <div class="container">
          <h1 class="display-4">{{ zipcode }}</h1>
          <p class="lead">This zip code has {{ notices_count }} records and {{ total_notices }} total notices. There are {{ "{:,}".format(owner_occupied) }} owner-occupied housing units in this zip code, according to the Census Bureau's American Community Survey.</p>
        </div>
      </div>
      <div id="container"></div>
      <script>
        anychart.onDocumentReady(function () {
            var data = {{ notice_json|tojson }};
            chart = anychart.heatMap(data);
            chart.title("Monthly Foreclosure Notices");
            var customColorScale = anychart.scales.linearColor();
            customColorScale.colors(["#ACE8D4", "#00726A"]);
            chart.colorScale(customColorScale);
            chart.container("container");
            chart.draw();
        });
      </script>
    </div>
  </body>
</html>
Save both app.py and detail.html and reload the page. That’s better!
But notice that the page load is slower than it used to be? That’s because each time we hit a detail page, the app needs to call out to the Census API and wait for it to respond. That might be necessary for some apps, but considering how infrequently ACS data changes, it would be better if we could store this information in the database. We’re already storing information about the zip codes in our notices table. Let’s create a separate Python script that will fetch the Census data and store it in our database. Create a file called zips.py:
import os
from peewee import *
from census import Census
from app import *
db = SqliteDatabase('foreclosures.db')
census_api_key = os.environ.get('CENSUS_API_KEY')
c = Census(census_api_key)

# get all the unique zips from the ZipMonths
all_zips = (ZipMonth.select(ZipMonth.zip).distinct())

# create a new table for the zip codes and owner_occupied figures
class ZipCode(Model):
    zipcode = CharField()
    owner_occupied = IntegerField(null = True)

    class Meta:
        database = db

# create that table if it doesn't already exist
db.create_tables([ZipCode], safe=True)

# create a container to put my data in
rows_to_insert = []

# loop over our zip codes, retrieving Census data where possible
for zip in all_zips:
print(zip.zip)
if zip.zip != "No Zip Code":
    owner_occupied = c.acs5.state_zipcode(('NAME', 'B25003_002E'), '24', zip.zip)
    if owner_occupied and 'B25003_002E' in owner_occupied[0]:
        rows_to_insert.append({"zipcode": zip.zip, "owner_occupied": int(owner_occupied[0]['B25003_002E'])})

# insert the data we've collected
ZipCode.insert_many(rows_to_insert).execute()
Save that file and run it in terminal: python zips.py. It’ll take a bit. When it’s done, we can update our app.py and templates to use the new data.
First, we need to update app.py to let it know that the new table exists and we want to use it in the index() function:
import os
from peewee import *
from census import Census
from flask import Flask
from flask import render_template
app = Flask(__name__)
db = SqliteDatabase('foreclosures.db')
census_api_key = os.environ.get('CENSUS_API_KEY')
c = Census(census_api_key)

class ZipMonth(Model):
    id = IntegerField(unique=True)
    zip = CharField()
    month = DateField()
    notices = IntegerField()

    class Meta:
        table_name = "zip_months"
        database = db

class ZipCode(Model):
    zipcode = CharField()
    owner_occupied = IntegerField(null = True)

    class Meta:
        database = db

@app.route("/")
def index():
    notice_count = ZipMonth.select().count()
    all_zips = ZipCode.select()
    template = 'index.html'
    return render_template(template, count = notice_count, all_zips = all_zips)

@app.route('/zipcode/<slug>')
def detail(slug):
    zipcode = slug
    notices = ZipMonth.select().where(ZipMonth.zip==slug)
    total_notices = ZipMonth.select(fn.SUM(ZipMonth.notices).alias('sum')).where(ZipMonth.zip==slug).scalar()
    notice_json = []
    for notice in notices:
        notice_json.append({'x': str(notice.month.year) + ' ' + str(notice.month.month), 'y': notice.zip, 'heat': notice.notices})
    owner_occupied = c.acs5.state_zipcode(('NAME', 'B25003_002E'), '24', zipcode)
    return render_template("detail.html", zipcode=zipcode, notices=notices, notices_count=len(notices), notice_json = notice_json, total_notices = total_notices, owner_occupied = int(owner_occupied[0]['B25003_002E']))

if __name__ == '__main__':
    app.run(debug=True, use_reloader=True)
Then we need to update the index.html template file to refer to the zipcodes properly:
<!doctype html>
<html lang="en">
    <head>
        <link rel="stylesheet" href="https://stackpath.bootstrapcdn.com/bootstrap/4.3.1/css/bootstrap.min.css" crossorigin="anonymous">
    </head>
    <body>
    <nav class="navbar navbar-expand-lg navbar-dark bg-dark">
        <a class="navbar-brand" href="/">Maryland Foreclosure Notices by Zip Code</a>
    </nav>
      <div class="jumbotron">
        <div class="container">
            <h1>Maryland Notices of Foreclosure by Zip Code</h1>
            <p>There are {{ count }} records in the database.</p>
            <h3>Zip Codes</h3>
            <div class="row">
                <div class="col-md-4">
                <ul class="list-unstyled">
                    {% for zip in all_zips %}
                        <li><a href="/zipcode/{{ zip.zipcode }}">{{ zip.zipcode }}</a></li>
                        {% if loop.index % 3 == 0 and not loop.last %}
                        </ul>
                            </div>
                            <div class="col-md-4">
                                <ul class="list-unstyled">
                            {% endif %}
                        {% endfor %}
                    </ul>
                </div>
            </div>
        </div>
    </div>
    </body>
</html>
Next, we can tackle retrieving the zipcode and owner-occupied housing units from the database and not the API in the detail() function in app.py:
import os
from peewee import *
from census import Census
from flask import Flask
from flask import render_template
app = Flask(__name__)
db = SqliteDatabase('foreclosures.db')
census_api_key = os.environ.get('CENSUS_API_KEY')
c = Census(census_api_key)

class ZipMonth(Model):
    id = IntegerField(unique=True)
    zip = CharField()
    month = DateField()
    notices = IntegerField()

    class Meta:
        table_name = "zip_months"
        database = db

class ZipCode(Model):
    zipcode = CharField()
    owner_occupied = IntegerField(null = True)

    class Meta:
        database = db

@app.route("/")
def index():
    notice_count = ZipMonth.select().count()
    all_zips = ZipCode.select()
    template = 'index.html'
    return render_template(template, count = notice_count, all_zips = all_zips)

@app.route('/zipcode/<slug>')
def detail(slug):
    zipcode = ZipCode.get(ZipCode.zipcode==slug)
    notices = ZipMonth.select().where(ZipMonth.zip==slug)
    total_notices = ZipMonth.select(fn.SUM(ZipMonth.notices).alias('sum')).where(ZipMonth.zip==slug).scalar()
    notice_json = []
    for notice in notices:
        notice_json.append({'x': str(notice.month.year) + ' ' + str(notice.month.month), 'y': notice.zip, 'heat': notice.notices})
    return render_template("detail.html", zipcode=zipcode, notices=notices, notices_count=len(notices), notice_json = notice_json, total_notices = total_notices)

if __name__ == '__main__':
    app.run(debug=True, use_reloader=True)
And then update the detail.html template to take advantage of the data we have:
<!doctype html>
<html>
  <head>
    <title>Zip code: {{ zipcode }}</title>
    <link rel="stylesheet" href="https://stackpath.bootstrapcdn.com/bootstrap/4.3.1/css/bootstrap.min.css" crossorigin="anonymous">
    <script src="https://cdn.anychart.com/releases/8.7.1/js/anychart-core.min.js"></script>
    <script src="https://cdn.anychart.com/releases/8.7.1/js/anychart-heatmap.min.js"></script>
  </head>
  <body>
      <nav class="navbar navbar-expand-lg navbar-dark bg-dark">
        <a class="navbar-brand" href="/">Maryland Foreclosure Notices by Zip Code</a>
      </nav>
      <div class="jumbotron">
        <div class="container">
          <h1 class="display-4">{{ zipcode.zipcode }}</h1>
          <p class="lead">This zip code has {{ notices_count }} records and {{ total_notices }} total notices. There are {{ "{:,}".format(zipcode.owner_occupied) }} owner-occupied housing units in this zip code, according to the Census Bureau's American Community Survey.</p>
        </div>
      </div>
      <div id="container"></div>
      <script>
        anychart.onDocumentReady(function () {
            var data = {{ notice_json|tojson }};
            chart = anychart.heatMap(data);
            chart.title("Monthly Foreclosure Notices");
            var customColorScale = anychart.scales.linearColor();
            customColorScale.colors(["#ACE8D4", "#00726A"]);
            chart.colorScale(customColorScale);
            chart.container("container");
            chart.draw();
        });
      </script>
    </div>
  </body>
</html>
Save app.py and detail.html and reload the page for 20906. If it works, change the slug to /20901 and see how fast it loads. Nice!